
ftCommunity | Bilderpool | Unsere Modelle | Sonstiges | Spiele und Spielzeug | Spielautomaten | Apollo 11
APOLLO 11 - JULI 1969
Commander Neil Armstrong
Pilot Eagle - LM (Lunar Module) Edwin Aldrin
Pilot Columbia - CM (commando Module) Michael Collins
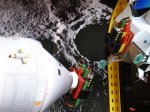
After loading the moon rocks and throwing away all sorts of unnecessary things including even the very expensive cameras,
the Eagle through the main engine ascended of the lunar surface. The launch platform remains at the moon behind.
They put the Eagle in a 70 km high orbit around the moon. If the Columbia above the lunar horizon appears, the Eagle
will be linked. The astronauts can then change the moonstones. After disconnecting, the Eagle will be crushed on the moon surface.
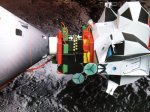
The docking to the Columbia did not go entirely smoothly as it has to be because Armstrong forgot to turn off the automatic pilot
of the lunar module, so unexpected movements were made by the Eagle.
This is the situation which in this model is simulated. Linking the lunarlander with the commandmodule with the lunarlander's
unpredictable behavior, while this procedure a certain time and thus primarily a amount of rocket fuel is reserved.
Exceeding this amount may cause problems interfere with the return to Earth.
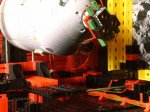
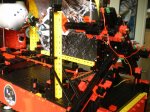
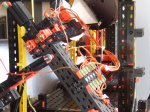
The model
The installation consists of a model of the Command Module which can move along three axes. Left, right, up, down and roll left
and right. Furthermore, a model of the Lunar Module which can move along two axes. Up, down and forward and backward.
In this way the linking structures of both vessels compared apart all realistic movements.
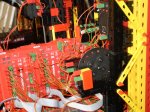
The Command Module will interwork through his control rockets. We do this by using push buttons. These are located on the
control panel but can also be used as remote as the situation on location should be considered. It is a very accurate job.
On the lunar module, we have no influence, that we can only move forward and backward. This will autonomously make some
unpredictable motions.
How it works
Communication between Columbia and Eagle is constantly heard in the background. First, an initialization runs.The LM and CM
come in a starting position and time/fuel quantity is made available.
When the initialisation is ready a lamp "start docking" is lighting. Pressing it does time run and with the knobs must the
CM to the link unit of the LM be maneuvered.
This should happen very controlled. As is known, an on-going movement in space will always continue unless it is slowed down
by an opposing force. If a button is released thereby not stop the movement, the light remains burning.
The movements are programmed to continue as long as they are made. In such an action can "counteract" be given, but this action
also continues after releasing the button. In short it requires some practice to be very dose to operate the buttons.
A beginner will not immediately come to a successful link with the least available fuel.
In short, wait for the moves to stabilize. Also important: start with one movement at a time. When the two vessels can be quite
in line LM slowly approaching. Caution should be exercised with the communication dishes.
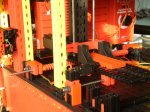
The coupling is a fact as three photocells are activated. Because there are three, the angle of the vessels must be exactly the same.
The holes of the lens caps must exactly match.
For this reason there are no lenslights on but ordinary lamps with also relatively weak light.
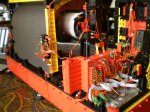
If the link is successful with the available fuel all the lights on the timer
flicker and a signal sounds.
During the procedure you see the lights of the fuel one after the other going out.
If the fuel is consumed first the first red light goes on and hear a beep and after a few seconds
will also be the last red light will come again and hear a signal then everything falls silent
and return to Earth impossible.
This model has a very high level play. Especially since practice is needed.
With enough experience, the software can reduce time and the position
of the LM can be changed; a new game boost!
http://www.youtube.com/watch?v=pmRNEEFduKY
In dieser Kategorie: 27 Bild(er) auf 3 Seite(n). Sie sehen: Bild 10 bis 18.
 P3020047 (dutchbuilder) Apollo 11 Kommentare: 0 |
 P3020049 (dutchbuilder) Apollo 11 Kommentare: 0 |
 P3020050 (dutchbuilder) Apollo 11 Kommentare: 0 |
 P3020052 (dutchbuilder) Apollo 11 Kommentare: 0 |
 P3020053 (dutchbuilder) Apollo 11 Kommentare: 0 |
 P3020054 (dutchbuilder) Apollo 11 Kommentare: 0 |
 P3020055 (dutchbuilder) Apollo 11 Kommentare: 0 |
 P3020058 (dutchbuilder) Apollo 11 Kommentare: 0 |
 P3020061 (dutchbuilder) Apollo 11 Kommentare: 0 |
|« zurück 1 2 3 weiter »|